
로그인 선택
미리보기
커뮤니티

 23.06.15
글 등록
DEVOTEE를 활성화 시키면
지금 작성한 커뮤니티 글에 대해 1개의 댓글을 달아줍니다.
버튼을 누르면 글 수정 시 ChatGPT가 작성한 댓글이 수정됩니다.
임시저장함
최대 20건까지 저장합니다.
| 컨텐츠 유형 | 제목 | 저장일 | 삭제 |
|---|

본인인증
고객님의 소중한 개인정보보호를 위해
본인인증을 진행해주세요. 본인인증 미 진행 시 로그인이 제한됩니다.
본인인증 로그인에 실패하였습니다.
회원이 아니시거나 본인인증 등록이
완료되지 않은 사용자입니다.
회원정보 연결
SpringBoot 으로 MSA 구현하기(2) - Spring Web MVC 기능(1)

- DEVOTEE 요약
- 이 블로그는 Spring Boot 웹 MVC의 기능과 설정에 대해 설명하고 있다. 먼저 pom.xml 설정에 대해 다루며, 필요한 라이브러리들을 추가한다. 그리고 plugin 설정을 통해 Maven으로 Spring Boot 패키징이나 실행을 할 수 있게 한다. 마지막으로 전체 pom.xml 파일을 소개한다.
어떤 기술이든 처음 접하게 되면 중요하지 않은(?) 많은 기능을 공부하게 되어 시간에 쫓기고 중간에 포기하는 경우가 많다.
물론 다 공부를 했다고 해도 정작 기억이 잘 나지 않는다. 슬로우 리딩이 좋긴 하지만 전체를 다 한 번 빠르게 중요한 내용만 보면 좋지 않을까?
이번 연재는 그런 마음으로 시작했다.
Java Enterprise Application 개발은 2000년 Servlet & JSP 로 구현한 MVC 패턴으로 시스템을 만들고 나서, 2006년 쯤(?, 정확하게 기억나지 않는다) Spring 과 Spring MVC 를 접한 것이 마지막이었다.
이 후 Spring Boot 을 잠시 살펴 보긴 했으나 이제 3.0 버전이 나왔으니 정리를 좀 해야할 시간인 것 같다.
Spring Web MVC 에서 살펴볼 기능은 다음과 같다.
pom.xml 에 필요한 라이브러리 설정
Annotation 으로 Spring Bean 선언
HTTP Get 에 대응하는 Controller 사용
HTTP Post 에 대응하는 Controller 사용
Json 으로 응답하기
Server Side Validation 과 Error 처리
File Upload 와 download
Filter 와 Interceptor
CORS 등록
환경 변수 설정 방법 (application.properties)
Logger 사용
참고로 Swagger UI, Unit Test 와 JPA 등은 다음에 계속 다룬다.
1. pom.xml 정리
Maven 을 주로 사용하기 때문에 Maven 의 필요한 라이브러리만 정리한다.
어플리케이션 이름 및 버전 설정
		<groupId>com.ask</groupId>
    <artifactId>example</artifactId>
    <version>0.0.1-SNAPSHOT</version>
    <name>springboot-example</name>
    <description>Demo project for Spring Boot</description>
Java 버전 설정
Spring Boot 3.0 부터는 Java 17 이상만 지원한다.
		<properties>
        <java.version>17</java.version>
    </properties>
Spring Boot 버전 설정
		<parent>
        <!-- Spring Boot 버전 -->
        <groupId>org.springframework.boot</groupId>
        <artifactId>spring-boot-starter-parent</artifactId>
        <version>3.1.1</version>
        <relativePath/>
    </parent>
Dependency 설정
spring-boot-starter-web 은 spring boot WebMvc 로 REST API 와 같이 웹 개발에 필요하다.
단 버전은 따로 지정하지 않는다. 위에 spring-boot-starter-parent 에서 이미 버전을 지정했기 때문에 호환되는 버전을 자동으로 사용하기 위해서이다.
snakeyaml 은 spring-boot-starter-web 에서 yaml 핸들링을 위해서 사용하는데 기본이 1.33 버전으로 취약성 문제가 있다. 그래서 취약성이 해결된 2.0 버전을 설정한다.
    <dependencies>
        <dependency>
            <!-- Spring Boot 에서 WebMvc 를 사용 -->
            <groupId>org.springframework.boot</groupId>
            <artifactId>spring-boot-starter-web</artifactId>
        </dependency>
        <dependency>
            <!-- Spring Boot 에서 사용하는 snakeyaml 1.x 의 취약점 때문에 2.0 으로 버전 업그레이드 -->
            <groupId>org.yaml</groupId>
            <artifactId>snakeyaml</artifactId>
            <version>2.0</version>
        </dependency>
spring-boot-devtools 은 개발 시에 Live Reload 나 Automatic Restart 등을 지원하기 위해서 사용한다. IntelliJ IDE 를 사용한다면 아래 세팅이 되어 있어야 한다.
Preferences >> Advanced Settings에서Allow auto-make to start even if developed application is currently running체크Preferences >> Build, Execution, Deployment >> Compiler에서Build Project automatically를 체크
spring-boot-configuration-processor 은 yaml 이나 properties 파일에서 사용하는 Configuration 자동 완성 기능을 위해서 필요하다.
application.properties 파일을 수정할 때 자동 완성 기능을 사용할 수 있다.
lombok 은 Java Bean 에 Getter 와 Setter 메소드를 자동으로 생성해 준다. 또한 로깅을 위한 Slf4j 와 logback 라이브러리를 포함하고 있다.
spring-boot-starter-test 은 Spring Boot 의 단위 테스트 코드 작성 가능하게 지원한다.
        <dependency>
            <!-- 개발 시에 Live Reload / Automatic Restart 등을 지원 -->
            <groupId>org.springframework.boot</groupId>
            <artifactId>spring-boot-devtools</artifactId>
            <scope>runtime</scope>
            <optional>true</optional>
        </dependency>
        <dependency>
            <!-- yaml / properties 파일에서 사용하는 Configuration 자동 완성 기능 -->
            <groupId>org.springframework.boot</groupId>
            <artifactId>spring-boot-configuration-processor</artifactId>
            <optional>true</optional>
        </dependency>
        <dependency>
            <!-- Getter/Setter 를 자동 생성 -->
            <groupId>org.projectlombok</groupId>
            <artifactId>lombok</artifactId>
            <optional>true</optional>
        </dependency>
        <dependency>
            <!-- Spring Boot 의 테스트 코드 작성 가능하게 지원 -->
            <groupId>org.springframework.boot</groupId>
            <artifactId>spring-boot-starter-test</artifactId>
            <scope>test</scope>
        </dependency>
spring-boot-starter-data-jpa 은 JPA 데이터 저장소에 필요, Pageable (페이지 단위 조회)와 같은 Web support 기능이다.
Pageable 은 데이터 쿼리와 관련 있으므로 JPA 라이브러리를 필요로 한다
hibernate-validator 는 JSR-303 Java Bean 데이터 검증, 예를 들면 null check, data length 등을 지원한다.
mysql-connector-java 와 hsqldb 는 지금은 필요 없는데 각각 mysql 과 hsqldb 접속에 필요하다.
        <dependency>
            <!-- JPA 데이터 저장소에 필요, Pageable 과 같은 Web support 기능 (Pageable 은 데이터 쿼리와 관련 있으므로) -->
            <groupId>org.springframework.boot</groupId>
            <artifactId>spring-boot-starter-data-jpa</artifactId>
        </dependency>
        <dependency>
            <!-- JSR-303 Java Bean 데이터 검증 (null check, data length 등) -->
            <groupId>org.hibernate</groupId>
            <artifactId>hibernate-validator</artifactId>
            <version>8.0.1.Final</version>
        </dependency>
        <dependency>
            <!-- JPA 에서 mysql 접속 driver -->
            <groupId>mysql</groupId>
            <artifactId>mysql-connector-java</artifactId>
            <version>8.0.33</version>
        </dependency>
        <dependency>
            <!-- JPA 에서 hsqldb 접속 driver -->
            <groupId>org.hsqldb</groupId>
            <artifactId>hsqldb</artifactId>
            <version>2.7.2</version>
        </dependency>
jakarta.servlet-api 는 Servlet 과 ServletFilter 을 사용하기 위해 필요한 인터페이스 라이브러리이다.
Spring 3.0 부터는 Servlet 을 위해 javax 패키지를 사용하지 않고 jakarta 패키지를 import 해야 한다.
(참고: https://github.com/spring-projects/spring-boot/wiki/Spring-Boot-3.0-Migration-Guide#jakarta-ee)
spring-boot-starter-actuator 는 Application 정보 모니터링에 필요하다. Spring Bean 리스트등을 볼 수 있는데 반드시 필요한 것은 아닌다.
jackson-dataformat-xml 은 WebMvcAutoConfiguration 에서 Resolver 등록에 사용된다.
Resolver 는 파라미터를 객체로 매핑 시키는 기능으로 Get, Post 등의 요청에서 파라미터를 추출하여 객체의 멤버 변수로 할당해 준다.
        <!-- Servlet / ServletFilter 을 사용하기 위해 -->
        <dependency>
            <groupId>jakarta.servlet</groupId>
            <artifactId>jakarta.servlet-api</artifactId>
            <version>6.0.0</version>
        </dependency>
        <dependency>
            <!-- Application 정보 모니터링 -->
            <groupId>org.springframework.boot</groupId>
            <artifactId>spring-boot-starter-actuator</artifactId>
        </dependency>
        <dependency>
            <!-- WebMvcAutoConfiguration 에서 Resolver 연결에 사용 -->
            <groupId>com.fasterxml.jackson.dataformat</groupId>
            <artifactId>jackson-dataformat-xml</artifactId>
            <version>2.15.2</version>
        </dependency>
    </dependencies>
Plugin 설정
Maven 에서 Spring Boot 패키징을 하거나 run 을 하기 위해서 필요한 plugin 이다.
    <build>
        <plugins>
            <plugin>
                <!-- maven 으로 spring jar/war 파일 패키징 -->
                <groupId>org.springframework.boot</groupId>
                <artifactId>spring-boot-maven-plugin</artifactId>
                <configuration>
                    <excludes>
                        <exclude>
                            <groupId>org.projectlombok</groupId>
                            <artifactId>lombok</artifactId>
                        </exclude>
                    </excludes>
                </configuration>
            </plugin>
        </plugins>
    </build>
전체 pom.xml 파일은 다음과 같다.
<?xml version="1.0" encoding="UTF-8"?>
<project xmlns="http://maven.apache.org/POM/4.0.0"
         xmlns:xsi="http://www.w3.org/2001/XMLSchema-instance"
         xsi:schemaLocation="http://maven.apache.org/POM/4.0.0 http://maven.apache.org/xsd/maven-4.0.0.xsd">
    <modelVersion>4.0.0</modelVersion>

    <groupId>com.ask</groupId>
    <artifactId>example</artifactId>
    <version>0.0.1-SNAPSHOT</version>
    <name>springboot-example</name>
    <description>Demo project for Spring Boot</description>

    <properties>
        <java.version>17</java.version>
    </properties>

    <parent>
        <!-- Spring Boot 버전 -->
        <groupId>org.springframework.boot</groupId>
        <artifactId>spring-boot-starter-parent</artifactId>
        <version>3.1.1</version>
        <relativePath/>
    </parent>

    <dependencies>
        <dependency>
            <!-- Spring Boot 에서 WebMvc 를 사용 -->
            <groupId>org.springframework.boot</groupId>
            <artifactId>spring-boot-starter-web</artifactId>
        </dependency>
        <dependency>
            <!-- Spring Boot 에서 사용하는 snakeyaml 1.x 의 취약점 때문에 2.0 으로 버전 업그레이드 -->
            <groupId>org.yaml</groupId>
            <artifactId>snakeyaml</artifactId>
            <version>2.0</version>
        </dependency>
        <dependency>
            <!-- 개발 시에 Live Reload / Automatic Restart 등을 지원 -->
            <groupId>org.springframework.boot</groupId>
            <artifactId>spring-boot-devtools</artifactId>
            <scope>runtime</scope>
            <optional>true</optional>
        </dependency>
        <dependency>
            <!-- yaml / properties 파일에서 사용하는 Configuration 자동 완성 기능 -->
            <groupId>org.springframework.boot</groupId>
            <artifactId>spring-boot-configuration-processor</artifactId>
            <optional>true</optional>
        </dependency>
        <dependency>
            <!-- Getter/Setter 를 자동 생성 -->
            <groupId>org.projectlombok</groupId>
            <artifactId>lombok</artifactId>
            <optional>true</optional>
        </dependency>
        <dependency>
            <!-- Spring Boot 의 테스트 코드 작성 가능하게 지원 -->
            <groupId>org.springframework.boot</groupId>
            <artifactId>spring-boot-starter-test</artifactId>
            <scope>test</scope>
        </dependency>
        <dependency>
            <!-- JPA 데이터 저장소에 필요, Pageable 과 같은 Web support 기능 (Pageable 은 데이터 쿼리와 관련 있으므로) -->
            <groupId>org.springframework.boot</groupId>
            <artifactId>spring-boot-starter-data-jpa</artifactId>
        </dependency>
        <dependency>
            <!-- JSR-303 Java Bean 데이터 검증 (null check, data length 등) -->
            <groupId>org.hibernate</groupId>
            <artifactId>hibernate-validator</artifactId>
            <version>8.0.1.Final</version>
        </dependency>
        <dependency>
            <!-- JPA 에서 mysql 접속 driver -->
            <groupId>mysql</groupId>
            <artifactId>mysql-connector-java</artifactId>
            <version>8.0.33</version>
        </dependency>
        <dependency>
            <!-- JPA 에서 hsqldb 접속 driver -->
            <groupId>org.hsqldb</groupId>
            <artifactId>hsqldb</artifactId>
            <version>2.7.2</version>
        </dependency>
        <!-- Servlet / ServletFilter 을 사용하기 위해 -->
        <dependency>
            <groupId>jakarta.servlet</groupId>
            <artifactId>jakarta.servlet-api</artifactId>
            <version>6.0.0</version>
        </dependency>
        <dependency>
            <!-- Application 정보 모니터링 -->
            <groupId>org.springframework.boot</groupId>
            <artifactId>spring-boot-starter-actuator</artifactId>
        </dependency>
        <dependency>
            <!-- WebMvcAutoConfiguration 에서 Resolver 연결에 사용 -->
            <groupId>com.fasterxml.jackson.dataformat</groupId>
            <artifactId>jackson-dataformat-xml</artifactId>
            <version>2.15.2</version>
        </dependency>
    </dependencies>

    <build>
        <plugins>
            <plugin>
                <!-- maven 으로 spring jar/war 파일 패키징 -->
                <groupId>org.springframework.boot</groupId>
                <artifactId>spring-boot-maven-plugin</artifactId>
                <configuration>
                    <excludes>
                        <exclude>
                            <groupId>org.projectlombok</groupId>
                            <artifactId>lombok</artifactId>
                        </exclude>
                    </excludes>
                </configuration>
            </plugin>
        </plugins>
    </build>

</project>
2. Annotation 으로 Spring Bean 선언
Spring Bean 으로 관리하면 Dependency Injection 을 할 수 있다. 쉽게 말해서 멤버 변수로 선언한 객체를 객체의 인스턴스 생성 코드없이 자동으로 주입할 수 있다.
다만, 한가지 조건이 있는데 인스턴스를 멤버 변수로 갖는 객체와 인스턴스가 주입될 객체 모두가 Spring Bean 이어야 한다.
Spring Bean 을 선언하는 방법은 아래 6가지가 있다.
1) 메소드에 @Bean 어노테이션을 선언하는 방법
메소드에 선언하는 방법은 해당 어노테이션 밖에 없다. 메소드를 통해 Spring Bean 을 생성하려면 해당 클래스도 Spring Bean 이어야 한다.
Application 클래스는 main 메소드를 갖는 클래스로 Bean 이기 때문에 Bean 을 생성 할 수 있다.
@SpringBootApplication
public class WebApplication {

    public static void main(String[] args) {
        final ConfigurableApplicationContext applicationContext = SpringApplication.run(WebApplication.class, args);

        String[] allBeans = applicationContext.getBeanDefinitionNames();
        for(String bean : allBeans) {
            if (bean.toLowerCase().endsWith("samplebean"))
                System.out.println(bean);
        }
        System.out.println("Total number of beans "+applicationContext.getBeanDefinitionCount());

    }

    @Bean
    public String sampleBean() {
        return "This is a Sample Bean";
    }
}

------- output -----------
sampleBean
Total number of beans 410
위와 같이 출력 결과를 보면 sampleBean 이름으로 Spring Bean 이 등록되어 있음을 알 수 있다.
@Bean 어노테이션에 특별한 name 을 설정하지 않으면 메소드명이 Bean 이름이 된다.
2) 클래스에 @Configure 를 선언한 경우
자바 설정 클래스에 해당 어노테이션을 사용하며, 이를 통해 Spring Bean 을 정의할 수 있다.
...

@Configure
public class WebServerConfig implements WebMvcConfigurer {
...
}
3) 클래스에 스테레오 타입 중 @Component 를 선언한 경우
클래스를 Spring Bean 으로 정의하는데 사용하는 가장 일반적인 어노테이션이다. 일반 클래스를 Spring Bean 으로 만들고 싶으면 해당 어노테이션을 사용한다.
...

@Component
public class DateUtil {
...
]
4) 클래스에 스테레오 타입 중 @Controller 를 선언한 경우
Spring WebMvc 에서 클라이언트의 요청을 받아주는 접점이 되는 클래스가 Controller 클래스이다.
해당 어노테이션을 선언하면 웹에서 필요한 HttpRequest 와 HttpResponse 객체를 사용할 수 있다.
지금은 어노테이션만 설명한다.
...

@RestController
public class AppController {
...
}
@Controller 를 상속한 @RestContrller 은 똑같은 효과를 내면서 좀 더 편리한 기능을 포함하고 있다.
5) 클래스에 스테레오 타입 중 @Service 를 선언한 경우
비즈니스 로직을 담당하는 서비스 클래스에 지정할 수 있는 어노테이션이다.
일반적으로 컨트롤러 객체가 멤버 변수로 서비스 클래스를 가지기 때문에 서비스를 객체를 컨트롤러 객체에 의존성 주입을 할 때 사용한다.
...

@Service
public class AppService implements AppServiceInterface {
...
}
6) 클래스에 스테레오 타입 중 @Repository 를 선언한 경우
데이터 베이스와 같은 영속성 리파지토리와 통신하는 클래스에 지정하는 어노테이션이다.
3. HTTP Get 에 대응하는 Controller 사용
HTTP 메소드별 대응하는 리소스는 다음과 같다. 리소스는 주로 명사형, 그리고 복수형으로 명명한다.
POST: 리소스를 생성한다. (url:/apps)GET: 리소스를 조회한다. (리스트 조회 url:/apps혹은, 상세 조회 url:/apps/{appId})PUT: 리소스 전체 데이터를 수정한다. (url:/apps/{appId})PATCH: 리소스의 일부 데이터를 수정한다. (url:/apps/{appId})DELETE: 리소스를 삭제한다. (멀티 삭제 url:/apps혹은, 1건 삭제 url:/apps/{appId})
사용자 요청을 받는 Controller 역할을 하기 위해서는 @Controller 어노테이션이 사용하면 된다.
이 때, 화면에 렌더링하여 보여주는 역학을 하는 view 가 필요하며 이를 위해 view 객체를 지정해서 리턴한다. 그러나 Json 으로 리턴하고자 할 때는 view 가 필요없다.
그래서 @ResponseBody 어노테이션을 사용하면 자동으로 Json 객체로 리턴한다.
...
@Controller
public class AppController {

    @ResponseBody
    @GetMapping(path = "/app/{appId}")
    public AppResponse getApps(
    ...
...
}
하지만 매번 2개를 같이 지정하는 것이 불편하다.
그래서 @Controller 와 @RespnoseBody 를 합친 @RestController 라는 어노테이션을 제공한다. Rest API 를 개발한다면 @RestController 어노테이션을 사용하자.
...
@RestController
public class AppController {

    @GetMapping(path = "/app/{appId}")
    public AppResponse getApps(
            @PathVariable(value = "appId") Long appId,
            @RequestParam(value = "appName") String appName) {

        return AppResponse.createAppResponse(appId, appName);
    }
}
1) HTTP Get 메소드 구현
HTTP GET 메소드 일 경우 @GetMapping 을 클래스 메소드에 지정하고 path 속성으로 uri 를 매핑하면, uri 요청이 들어왔을 때 해당 메소드가 호출된다.
path 에서 {} 는 변수로 사용될 수 있다. 여기에 들어온 변수는 @PathVariable 로 값을 추출할 수 있고, Get 으로 호출된 파라미터는 @RequestParam 으로 추출할 수 있다.
@RestController
public class AppController {
    @GetMapping(path = "/apps/{appId}")
    public ResponseEntity<AppResponse> getApps(
            @PathVariable(value = "appId") Long appId,
            @RequestParam(value = "appName") String appName) {

        return new ResponseEntity<>(
                AppResponse.createAppResponse(appId, appName),
                HttpStatus.OK);
    }
}
클라이언트에서 호출하면 다음과 같은 결과를 받는다.
$ curl "http://localhost:18080/apps/1131?appName=spring-sample"

--------- output ------------
{
  "id": "1131",
  "appName": "spring-sample",
  "createdAt": "2023-07-31 11:05:53.913",
  "tasks": [
    {
      "version": "v1",
      "createdAt": "2023-07-31 11:05:53.913",
      "id": "16907691539139533"
    },
    {
      "version": "v2",
      "createdAt": "2023-07-31 11:05:53.913",
      "id": "16907691539133283"
    }
  ]
}
uri 중에서 /apps/1131?appName=spring-sample" 를 보면 1131 은 appId 의 값으로 pathVariable 에 속하고
?appName=apring-sample 에서 appName 은 RequestParam 에 속한다.
ResponseEntitry 와 AppResponse 클래스는 5. Json 으로 응답하기 에서 자세히 설명한다.
2) Resolver 로 HTTP 헤더 값 객체로 변환하여 받기
HTTP Header 로 넘어오는 값들도 객체로 자동 변환하여 사용할 수 있다.
헤더 값을 받을 객체를 생성한다. 여기서는 ClientInfo 객체이다.
HandlerMethodArgumentResolver인터페이스를 구현하여 ClientInfo 객체를 생성한다.WebMvcConfigurer인터페이스를 구현하여 Resolver 를 등록한다.Controller 에서 헤더 값을 객체로 받는다.
ClientInfo 객체는 다음과 같다.
@Getter
@ToString
public class ClientInfo {

    private final String channel;
    private final String clientAddress;

    public ClientInfo(String channel, String clientAddress) {
        this.channel = channel;
        this.clientAddress = clientAddress;
    }
}
HandlerMethodArgumentResover 인터페이스를 구현한다. 헤더 값을 가져와서 ClientInfo 객체를 생성하는 부분에 주목한다.
public class ClientInfoArgumentResolver implements HandlerMethodArgumentResolver {

    private static final String HEADER_CHANNEL = "X-APP-CHANNEL";
    private static final String HEADER_CLIENT_IP = "X-FORWORD-FOR";

    @Override
    public boolean supportsParameter(MethodParameter parameter) {
        return ClientInfo.class.equals(parameter.getParameterType());
    }

    @Override
    public Object resolveArgument(@Nullable MethodParameter parameter,
                                  ModelAndViewContainer mavContainer,
                                  NativeWebRequest webRequest,
                                  WebDataBinderFactory binderFactory) throws Exception {

        String channel = webRequest.getHeader(HEADER_CHANNEL);
        String clientAddress = webRequest.getHeader(HEADER_CLIENT_IP);
        return new ClientInfo(channel, clientAddress);
    }
}
WebMvcConfigurer 인터페이스를 구현한다. 이 클래스는 @Configuration 어노테이션으로 Spring Bean 으로 생성되어야 하고, 위의 Resolver 를 등록한다.
@Configuration
public class WebServerConfig implements WebMvcConfigurer {
    @Override
    public void addArgumentResolvers(List<HandlerMethodArgumentResolver> resolvers) {
        resolvers.add(new ClientInfoArgumentResolver());
    }
}
Controller 에서 헤더 값을 객체로 받는다.
@RestController
public class AppController {

    @GetMapping(path = "/apps/{appId}")
    public ResponseEntity<AppResponse> getApps(
            // 이 부분이 추가되었다
            ClientInfo clientInfo,
            @PathVariable(value = "appId") Long appId,
            @RequestParam(value = "appName") String appName) {

				// 값을 출력한다.
        System.out.println(clientInfo);

        return new ResponseEntity<>(
                AppResponse.createAppResponse(appId, appName),
                HttpStatus.OK);
    }
}
아래와 같이 호출하면 서버 로그에 출력되는 것을 알 수 있다.
$ curl "http://localhost:18080/apps/1131?appName=spring-sample" \
   -H "X-APP-CHANNEL: Web" \
   -H "X-FORWARD-FOR: 192.168.3.10"

------- 출력된 서버 로그 ---------------
ClientInfo(channel=Web, clientAddress=192.168.3.10)seungkyua 님의 최신 블로그
더보기-

- Kubernetes 배포 및 설정 단계별 설명
- Kubernetes 로 개발을 하다보면 이를 위한 cluster 가 하나씩은 있어야 한다. 로컬에 vm 이나 클라우드에 싱글 vm 을 받았다면 아래와 같이 kubeadm 을 활용하여 나만의 클러스터를 구축할 수 있다. 단계적으로 설정하는 방법을 설명하고 있으니 이를 그대로 따라하면 된다. 1. sudo 사용자 추가, 보안 s/w 내리기, swap off $ sudo adduser ask $ cat 〈〈 EOF | sudo tee /etc/sudoers.d/sudoers-ask ask ALL=(ALL:ALL) NOPASSWD:ALL EOF $ sudo systemctl stop ufw $ sudo systemctl disable ufw $ sudo systemctl...
-
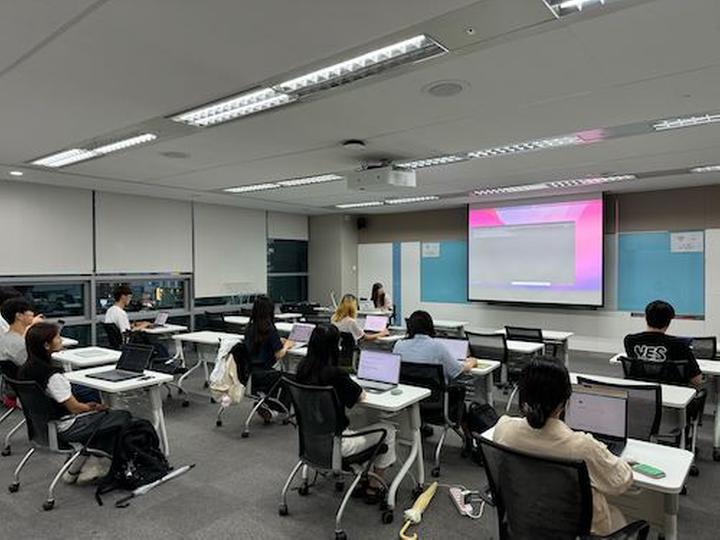
- OpenLab - Deep Dive Kubernetes 7번째 마지막 스터디
- 벌써 마지막 스터디네요. 처음 쿠버네티스의 기본 개념과 활용법을 스터디하고, ArgoCD 를 활용한 GitOps CD 를 공부하고, Go 언어와 커스텀 컨트롤러를 거쳐서, Kubeflow 까지 왔습니다. 7/16(화)에는 OpenLab - Deep Dive Kubernetes 스터디 7번째 마지막 모임이 있었습니다. 이번 스터디 주제는 Kubeflow 의 활용법 입니다. Kubeflow 의 기능은 다양한데, 대표적인 기능이 Pipeline 을 활용한 workflow 만들기와 Katib 를 이용한 hyperparameter tuning, 그리고, KServe 를 활용한 모델 서빙이 있습니다. 오늘은 위 3가지를 모두 공부했습니다. 1가지만 해도 2시간 이상은 필요한...
-
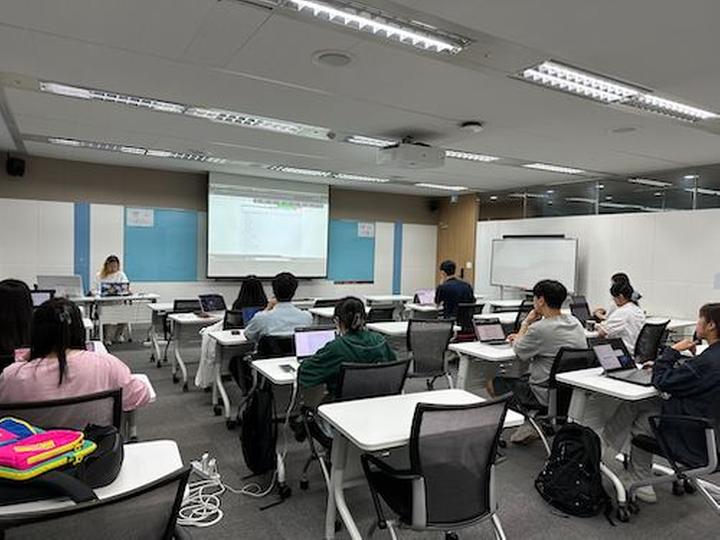
- OpenLab - Deep Dive Kubernetes 6번째 스터디
- 안녕하세요. 7/2(화)에는 OpenLab - Deep Dive Kubernetes 스터디 6번째 모임이 있었습니다. 이번과 마지막 7번째 스터디 2회에 걸쳐서 Kubeflow 에 대해서 공부합니다. 이번 스터디 주제는 Kubeflow 설치 및 대시보드 띄우기입니다. Kubeflow 는 많은 컴포넌트로 구성되어 있어 설치하는 것만도 쉽지가 않습니다. 그래서 이번에는 Kubeflow 를 설치하고 화면을 직접 접속해 보는 것을 스터디 주제로 정했습니다 물론, 다음 마지막 스터디에서는 Kubeflow 를 어떻게 활용하는지 활용 방법과 기능에 대해서 살펴볼 예정입니다. 금번 스터디 내용은 아래와 같습니다. Kubeflow Kubeflow 설치하기 KServe 설치하기 (...
-
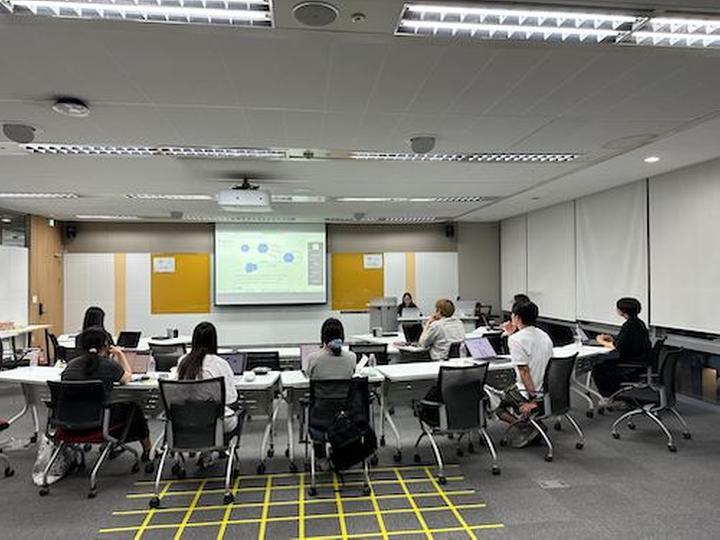
- OpenLab - Deep Dive Kubernetes 5번째 스터디
- 안녕하세요. 지난 6/17(월)에는 OpenLab - Deep Dive Kubernetes 스터디 5번째 모임이 있었습니다. 이번 모임으로 벌써 스터디의 2/3 가 지났네요. :) 이번 스터디 주제는 지난번 스터디의 연속인 custom controller 만들기 두번째 입니다. 지난번 스터디가 Custom Controller 를 만들기 위한 Go 언어에 대한 스터디 였다면, 이번에는 Kubebuilder 로 직접 Go 언어 코드 프로그래밍을 해보는 시간이었습니다. 금번 스터디 내용 Kubebuilder https://book.kubebuilder.io/ kubebuilder 아키텍처 살펴보기 controller-runtime 은 무엇인가? kubebuilder 로...
DEVOTEE 추천 블로그
-

- SpringBoot 으로 MSA 구현하기(4) - Spring Web MVC 기능(3)
- Spring Web MVC 에서 살펴볼 기능은 다음과 같다. (1편 , 2편) pom.xml 에 필요한 라이브러리 설정 Annotation 으로 Spring Bean 선언 HTTP Get 에 대응하는 Controller 사용 HTTP Post 에 대응하는 Controller 사용 Json 으로 응답하기 Server Side Validation 과 Error 처리 File Upload 와 download Filter 와 Interceptor CORS 등록 환경 변수 설정 방법 (application.properties) Logger 사용 7. File Upload 와 download 파일 업로드는 MultipartFile 로 쉽게 핸들링이 가능하다. @RestCon...
-

- Spring Boot 나만의 의존성 설정하기
- 들어가며 Spring Boot 는 자동설정 기능을 제공하여 Spring 에서 개발자가 직접 설정하던 많은 설정 파일들 없이 손쉽고 빠르게 제품을 개발할 수 있습니다. 이번 포스트 에서는 Spring Boot 의 자동설정에 대해 간단히 살펴보고 나만의 자동설정 파일을 만들어 보도록 하겠습니다. 자동설정 이란 간단한 스프링 부트 프로젝트를 만들어 보겠습니다. 저는 인텔리 제이 Ultimate 버전을 사용 하는데요, 굳이 Ultimate 가 아닌 무료 버전도 손쉽게 프로젝트를 만들 수 있는 방법을 제공 합니다. 다음〉 버튼을 클릭해서 의존성을 설정해 줍니다. Web 만 설정해 주겠습니다. 프로젝트가 준비되면 애플리케이션을 실행해 줍니다. 보시면 아무 것도 없는 빈 프로...
-

- [SpringBatch 연재 02] SpringBatch 코드 설명 및 아키텍처 알아보기
- Basic Spring Batch Application 이론은 나중에 살펴보고, 우선 스프링배치를 실행해보자. 우리는 스프링배치 중 Tasklet이라는 것을 만들고 스프링 배치를 수행해 볼 것이다. 이전연제 살펴보기 SpringBatch 연재 01] SpringBatch 빠르게 시작하기 프로젝트 준비 이전 아티클에서 만든 스프링 배치를 그대로 이용할 것이다. 참고로 우리는 스프링 배치 3.0 이상 버젼을 이용하므로 @EnableBatchProcessing 이 필요하지 않다. 기본 배치 어플리케이션 01.InitSpringBatch 에서 생성한 스프링 배치 어플리케이션을 그대로 이용할 것이다. 다음과 같은 과정을 거치게 된다. Tasklet 구현체를 생성한다. @C...

DEVOTEE를 활성화 시키면
지금 작성한 댓글에 AI가 댓글을 달아줍니다.