
로그인 선택
미리보기
커뮤니티

 23.06.15
글 등록
DEVOTEE를 활성화 시키면
지금 작성한 커뮤니티 글에 대해 1개의 댓글을 달아줍니다.
버튼을 누르면 글 수정 시 ChatGPT가 작성한 댓글이 수정됩니다.
임시저장함
최대 20건까지 저장합니다.
| 컨텐츠 유형 | 제목 | 저장일 | 삭제 |
|---|

본인인증
고객님의 소중한 개인정보보호를 위해
본인인증을 진행해주세요. 본인인증 미 진행 시 로그인이 제한됩니다.
본인인증 로그인에 실패하였습니다.
회원이 아니시거나 본인인증 등록이
완료되지 않은 사용자입니다.
회원정보 연결
[python/c] CYTHON 입문자를 위한 Q&A

- DEVOTEE 요약
- SK하이닉스 DRAM 노광 포토 기술팀의 TL은 최근 CYTHON 3.0 버전이 릴리스 된 것에 대해 이야기하며, 개인적으로는 NUMPY와의 연계보다는 C 라이브러리들과의 연계를 더 강화해줬으면 좋겠다는 바람을 표명했다. 그리고 이 글에서는 CYTHON 입문자들을 위한 몇 가지 자문자답들을 공유하였다.
안녕하세요. SKHYNIX DRAM노광포토기술팀 장우석 TL입니다.
CYTHON은 C로 작성한 코드를 PYTHON에서 활용할 수 있도록 하는 라이브러리, 스크립트 입니다.
최근 3.0버전이 릴리즈 되었습니다.
(https://appmaster.io/ko/news/c-paweoro-pythoneul-ganghwahaneun-cython-3-gonggae)
이 업데이트 방향에 대해, 다들 어떻게 생각하시는지 궁금해요.
퓨어 파이선 모드, NUMPY와의 연계를 더 강화했고, 앞으로도 그렇게 한다고 하는데요.
개인적으로는 NUMPY로도 속도가 모자라서 CYTHON을 쓰는데, NUMPY와의 연계를 강화하기 보단, 그 외 C LIBRARY들과의 연계를 더 강화해줬으면 하는 바람이 있습니다.
저는 파이선의 파일 입출력, REQUESTS 모듈은 굉장히 좋아해요.
이 기능들을 그대로 사용하면서, 데이터를 가공하는 부분만 C 라이브러리로 대체하려고 CYTHON을 쓰는데, 차라리 C 코드를 그대로 복붙해도 돌아가도록 하는 방향으로,
PYTHON보다는 C 쪽으로 더 가깝게 진화해줬으면 하는 바람이 있습니다.
이 글에서는 CYTHON 입문자들을 위한 몇 가지 자문자답들을 공유 드리려고 합니다.
CYTHON이 뭔지, 어떻게 해야 CYTHON CODE를 실행할 수 있는지 등등의 기초적인 내용은 다루지 않으려고 해요.
아래 TEUS 님께서 정리해주신 멋진 CYTHON 포스팅과, CYTHON 공식 문서들을 참고해주셨으면 합니다.
[Python] 고성능 Python을 위한 Cython 활용하기 1편
[Python] 고성능 Python을 위한 Cython 활용하기 2편
[Python] 고성능 Python을 위한 Cython 활용하기 3편
CYTHON TUTORIAL
https://cython.readthedocs.io/en/latest/src/tutorial/cython_tutorial.html
QUESTION 1. PYX 파일을 컴파일 할 때, 옵션들을 주고 싶어요.
from setuptools import Extension, setup
from Cython.Build import cythonize
import numpy as np
import os

ext_modules = [
    Extension(
        "malloc_test",                          #생성할 모듈의 이름
        ["malloc_test.pyx"],                    #사이선 소스 코드의 이름
        extra_compile_args=['-fopenmp','-O2'],  #c->obj로 gcc나 msvc가 컴파일 할 텐데 그 때 주고 싶은 옵션들
        extra_link_args=['-fopenmp'],           #obj->so/pxd로 gcc나 msvc가 링크 할 텐데 그 때 주고 싶은 옵션들
    )
]

setup(
    ext_modules=cythonize(
        ext_modules,
        compiler_directives={'language_level': 3,'boundscheck':False,'wraparound':False},
        #compiler_dierectives : cython이 pyx->c 변환할 때 줄 옵션들, gcc나 msvc에 주는 옵션과 별개 입니다.
        #https://cython.readthedocs.io/en/latest/src/userguide/source_files_and_compilation.html#compiler-directives
        annotate=True),
    include_dirs = [os.getcwd(), np.get_include()] #include하고 싶은 pxd 파일이 위치한 경로들을 적어주시면 됩니다.
)

#python3 setup.py build_ext --inplace
setup.py를 위와 같이 구성하시면 됩니다.
openmp관련해서 /openmp(window, msvc), -fopenmp(ubuntu, gcc) 옵션을 주고 싶으시거나 할 때 참고하시면 될 것 같아요.
QUESTION 2. 저는 윈도우 사용자이지만, msvc 가 없어요. mingw로 컴파일 하고 싶어요
python3 setup.py build_ext --inplace --compiler=mingw32

Global options:
  --verbose (-v)  run verbosely (default)
  --quiet (-q)    run quietly (turns verbosity off)
  --dry-run (-n)  don't actually do anything
  --help (-h)     show detailed help message
  --no-user-cfg   ignore pydistutils.cfg in your home directory

Options for 'build_ext' command:
  --build-lib (-b)     directory for compiled extension modules
  --build-temp (-t)    directory for temporary files (build by-products)
  --plat-name (-p)     platform name to cross-compile for, if supported
                       (default: win-amd64)
  --inplace (-i)       ignore build-lib and put compiled extensions into the
                       source directory alongside your pure Python modules
  --include-dirs (-I)  list of directories to search for header files
                       (separated by ';')
  --define (-D)        C preprocessor macros to define
  --undef (-U)         C preprocessor macros to undefine
  --libraries (-l)     external C libraries to link with
  --library-dirs (-L)  directories to search for external C libraries
                       (separated by ';')
  --rpath (-R)         directories to search for shared C libraries at runtime
  --link-objects (-O)  extra explicit link objects to include in the link
  --debug (-g)         compile/link with debugging information
  --force (-f)         forcibly build everything (ignore file timestamps)
  --compiler (-c)      specify the compiler type
    List of available compilers:
    --compiler=bcpp     Borland C++ Compiler
    --compiler=cygwin   Cygwin port of GNU C Compiler for Win32
    --compiler=mingw32  Mingw32 port of GNU C Compiler for Win32
    --compiler=msvc     Microsoft Visual C++
    --compiler=unix     standard UNIX-style compiler
  --parallel (-j)      number of parallel build jobs
  --swig-cpp           make SWIG create C++ files (default is C)
  --swig-opts          list of SWIG command line options
  --swig               path to the SWIG executable
  --user               add user include, library and rpath
  --help-compiler      list available compilers
--compliler 옵션을 주면 컴파일러를 선택할 수 있습니다. 하지만 별로 추천하지는 않습니다.
윈도우에서는 msvc, 리눅스에서는 gcc로 컴파일 하도록 기본 셋팅이 되어 있는데, 기본 셋팅 대로 따라 가시는 게 정체불명의 에러가 덜 발생할 거에요.
QUESTION3. cython에서 c std library / python의 c api를 호출하고 싶어요
from libc.stdio cimport *
from libc.stdlib cimport *
from cpython cimport *

cpdef char* PyStr_to_CChar(str tg):
    cdef bytes temp = PyUnicode_AsUTF8String(tg)
    cdef char* rst = PyBytes_AsString(temp)
    return rst

cdef str PyStr = "hello world!"
cdef char* CChar = PyStr_to_CChar(PyStr)
printf("%s",CChar)
간단한 예제 입니다.
include <stdio.h> 는
cython에서는 from libc.stdio cimport *
이렇게 적어주시면 됩니다.
python의 c api를 코드 안에서 사용하는 것도
from cpython cimport *
구문으로 모든 python c api를 사용할 수 있고요.
다만, 이 코드에서 눈여겨 봐야 할 점은
cdef str PyStr = "hello world!"
cdef char* CChar = PyStr_to_CChar(PyStr)
printf("%s",CChar)
이 부분입니다.
printf는 stdio.h에 정의된 c 라이브러리 함수 입니다.
c 로 작성된 함수들은 python object를 받아들일 수 없습니다.
반드시 python object를 c 자료형으로 변환한 뒤에 c 함수에 넣어줘야 정상적으로 함수가 작동합니다.
반대로 c 함수로 처리한 결과물을 아웃풋할 때도 파이선 오브젝트로 다시 변환시켜주고서 아웃풋 해주셔야 겠지요.
QUESTION4. cython에서 python object를 어떻게 c 자료형으로 변환하나요? 그 반대는 어떻게 하죠?
from libc.stdio cimport *
from libc.stdlib cimport *
from libc.string cimport *
from cpython cimport *


#py str을 c char로 변환
cpdef char* PyStr_to_CChar(str tg):
    cdef bytes temp = PyUnicode_AsUTF8String(tg)
    cdef char* rst = PyBytes_AsString(temp)
    return rst

#c char를 py str로 변환
cpdef str CChar_to_PyStr(char* tg):
    cdef str rst =  PyUnicode_DecodeUTF8(tg,strlen(tg),"can not decode")
    return rst


cdef str PyStr = "hello world!"
cdef char* CChar = PyStr_to_CChar(PyStr)
printf("%s\n",CChar)

cdef str PyStr2 = CChar_to_PyStr(CChar)
print(PyStr2)
여러 방법이 있겠지만 저는 cpython의 c api를 활용하는 편입니다. 아래 python c api docs의 구상객체 계층단락을 읽어보시면 위와 같은 코드를 작성하실 수 있을 거예요.
(https://docs.python.org/ko/3/c-api/concrete.html)
from cpython cimport *

#py int <> c long
cdef long PyInt_to_CLong(int tg):
    cdef long rst = PyLong_AsLong(tg)
    return rst

cdef int CLong_to_PyInt(long tg):
    cdef int rst = PyLong_FromLong(tg)
    return rst


#py float <> c double
cdef double PyFloat_to_CDboule(float tg):
    cdef double rst = PyFloat_AsDouble(tg)
    return rst

cdef float CDboule_to_PyFloat(double tg):
    cdef double rst = PyFloat_FromDouble(tg)
    return rst
python str <> c char*
python int <> c long
python float <> c double
이 매칭 관계는 cython이나 python c api를 사용하시는 분이라면 기억해두셔야 합니다.
from cpython cimport *
from libc.stdlib cimport *
from libc.string cimport *
from libc.stdio cimport *

cpdef char* PyStr_to_CChar(str tg):
    cdef bytes temp = PyUnicode_AsUTF8String(tg)
    cdef char* rst = PyBytes_AsString(temp)
    return rst

cdef list ListStr = ['happy','people','skhynix','engr']

cdef char** ArrChar = <char**> malloc(sizeof(char*)*len(ListStr))
cdef char* c_item
cdef size_t index
cdef str item
for index,item in enumerate(ListStr):
    ArrChar[index] = <char*> malloc(sizeof(char)*(len(item)+1))
    strcpy(ArrChar[index],PyStr_to_CChar(item))

for i in range(len(ListStr)):
    printf("%s\n",ArrChar[i])
    free(ArrChar[i])
free(ArrChar)
이건 파이선 리스트를 c array로 변환하여 사용하는 간단한 예시 입니다.
cython을 사용할 때는 보통 다음과 같은 과정을 거칩니다.
step 1 - 파이선 오브젝트를 c 자료형으로 변환
step 2 - c 라이브러리로 데이터 처리
step 3 - c 자료형을 다시 파이선 오브젝트로 변환
step 1과 3 때문에 cython을 사용한 코드가 오히려 더 느린 경우가 발생할 수 있는데, step 2에서 얼마나 속도를 벌어줄 수 있는지가 관건입니다. c 프로그래밍 실력이 여기서 중요해져요.
(세상에, 파이선만 해도 골 아픈데 c까지 잘해야 한다고?????)
QUESTION5. c api로 파이선 string을 char*로 변환하여 사용하려고 하는데 자꾸 segmentation fault가 발생합니다.
from libc.stdio cimport *
from libc.stdlib cimport *
from libc.string cimport *
from cpython cimport *


#py str을 c char로 변환
cpdef char* PyStr_to_CChar(str tg):
    cdef bytes temp = PyUnicode_AsUTF8String(tg)
    cdef char* rst = PyBytes_AsString(temp)
    return rst

#c char를 py str로 변환
cpdef str CChar_to_PyStr(char* tg):
    cdef str rst =  PyUnicode_DecodeUTF8(tg,strlen(tg),"can not decode")
    return rst
자주 일어나는 일입니다.
위에서 공유 드린 py str을 c char로 변환하는 함수에 저희 하이닉스 공장의 어떤 천몇백 억 쯤 하는 장비에서 나온 로그 파일 같은 걸 통으로 때려넣으면
segmentation fault 에러가 발생하면서 프로그램이 죽어버릴 거에요.
겨우 수 메가 바이트 정도 되는 파일을 넣었는데도 segmentation fault가 발생하는 걸 보면 기가 차실 텐데,
이게 heap 내에 python heap이 따로 있고 저 함수들은 python heap의 크기를 넘어서는 양의 데이터는 처리하지 못하기 때문입니다.
(정확히 찾아보진 않았지만, 경험 상 약 5만 바이트 정도 되는 것 같아요)
그래서 큰 xml 문서나, html 파일 같은 걸 c library로 처리하고 싶을 땐 다음과 같은 코드로 process heap에 데이터를 할당해놓고, str을 하나하나 옮기셔야 할 거에요.
from cpython cimport *
from libc.stdlib cimport *
from libc.stdio cimport *

cpdef char* PyStr_to_CChar(str tg):
    cdef bytes temp = PyUnicode_AsUTF8String(tg)
    cdef char* rst = PyBytes_AsString(temp)
    return rst

cdef str xml = '<root><data>test</data></root>'
cdef size_t len_xml = len(xml)

cdef char* buf = <char*> calloc(len_xml,sizeof(char))

for i in range(len_xml):
    buf[i] = PyStr_to_CChar(xml[i])[0]

printf("%s",buf)
free(buf)
https://docs.python.org/ko/3/c-api/bytes.html
아, 그리고, python c api를 보면 이런 내용도 있습니다. c api를 통해서 str <> char* 변환하는 건 사실, str 객체 안에 있는 char* 포인터를 꺼내는 것입니다.
이 포인터가 가리키는 내용물을 수정하거나 할당을 해제하면 object의 불변성이 깨지기 때문에 안 됩니다.
수정, 할당이 필요한 경우에도 위 같은 코드를 통해서 heap에 메모리를 할당하고 복사해서 사용해주세요.
QUESTION6. OPENMP를 이용하여 병렬 처리를 하려고 하는데 segmentation fault가 발생합니다.
이 문제에 대해서는 완전한 해결책을 제시해드리긴 어렵습니다. 다만 팁을 드리면, 함수를 가능한 다음과 같은 형태로 선언하시는 것이 error를 줄이는 최선의 방법입니다.
from cython.parallel import prange

cdef double 전역변수

cdef void some_function(*args):
    cdef double 지역변수
    cdef double 지역변수2
    /* 함수들 */

for i in prange(n, nogil=True):
    some_function(전역변수)
병렬화하고자 하는 블록을 통으로 함수로 감싸세요.
병렬화해야 하는 블록이 참조 해야 하는 전역변수를 명시적으로 argument로 주세요.
prange 구문 안에서는 최대한 지역변수를 활용해야 합니다.
다중 thread로 작동하는 함수가 전역변수에 접근을 많이 할 수록 error가 발생할 확률이 높아집니다.
전역변수는 최대한 read만 할 수 있도록 하고, 불가피하게 전역 변수를 수정해야 할 때는 thread간 경합이 발생하지 않도록 주의해야 합니다.
이상입니다. 지금 생각나는 팁은 이 정도인데, 좀 더 생각 나면 devoceon에 적어두려고 해요.
cython 굉장히 가능성이 많은 흥미로운 툴 입니다. 여러분들도 많이 사용해보시고, 좋은 자료 서로서로 많이 공유 해주세요.
추가 질문. Py_ssize_t가 뭔가요?
python c api를 보다보면 저렇게 py_ssize_t라는 자료형을 인풋 받는 함수를 자주 보실 거예요.
결론만 이야기하면 Py_ssize_t는 signed size_t, 그러니까 long 입니다.
https://github.com/python/cpython/blob/main/Include/pyport.h
py_ssize_t는 pyport.h에 정의 되어 있습니다. ssize_t를 재정의한 게 py_ssize_t에요
https://github.com/gcc-mirror/gcc/blob/master/gcc/ginclude/stddef.h#L214
ssize_t는 stddef.h(c 표준 라이브러리)에 정의되어 있는데 long을 재정의한 자료형입니다.
long은 64비트 아키텍쳐 기준으로 32비트 부호가 있는 정수 형이에요.
jangwooseok2 님의 최신 블로그
더보기-

- C언어로 구현한 AVX 함수를 PYTHON에서 호출하여 연산 속도 개선하기
- 안녕하세요. SKHYNIX DRAM EUV노광PHOTO기술팀 장우석 TL입니다. 이 글에서는 여러분이 numpy나 tensorflow 같은 라이브러리를 스스로 구현해야 할 때 필요한 기술을 이야기하려고 합니다. 구체적으로는 이런 기술들 입니다. AVX? SIMD란? C언어로 작성한 함수를 PYTHON에서 호출하는 법 C언어로 구현한 AVX 함수를 PYTHON에서 호출하여 연산 속도 개선하는 예제 참고로, C 컴파일러는 MINGW64를 사용할 것입니다. (https://www.mingw-w64.org/downloads/) 1. AVX? SIMD란? (이미지 출처 : https://en.wikipedia.org/wiki/Advanced_Vector_Extensions...
-
- FastAPI에서 자동 생성되는 Swagger 문서의 cdn.jsdelivr.net 의존성 없애기
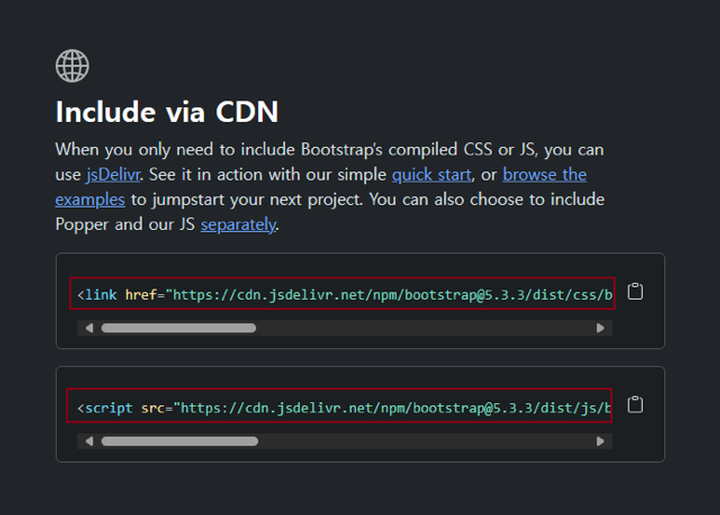
- 안녕하세요~ SKHYNIX DRAM EUV 노광PHOTO기술팀 장우석 TL입니다. 다들 알고 계시겠지만, 얼마 전에 큰 일이 있었어요. 인증서 문제로 인한 cdn.jsdelivr.net 접속 불능 사태 | GeekNews (hada.io) 지난 목요일(5/3)에 cdn.jsdelivr.net이 접속불능에 빠졌습니다. 저게 어떤 사이트냐면, bootstrap, jquery 등등을 저희가 link tag로 편하게 이용하고자 할 때, 무심코 접속하게 되는 사이트입니다. 제가 js, css 번들을 다운 받을 필요 없이, 단지 저 link tag를 html에 삽입하는 것만으로 위 라이브러리들을 사용할 수 있어서 편하게 사용들을 했었는데요. 저거 넣어서 만들었던 서비스들이 ...
-
- [C/PYTHON] Socket 기초 1 - 간단한 http 서버 만들기
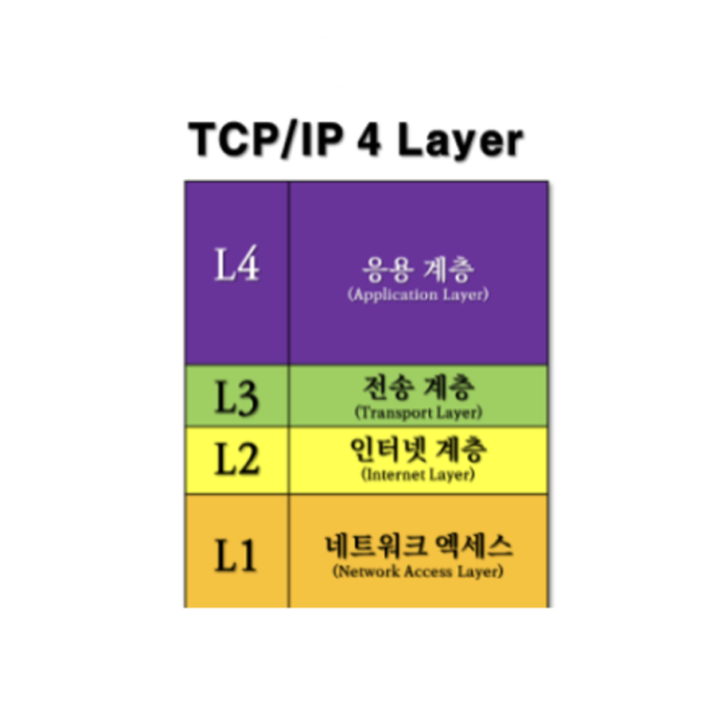
- 안녕하세요. SKHYNIX DRAM노광PHOTO기술팀 장우석 TL입니다. socket은 운영체제에 내장된, 전화를 거는 기능입니다. 조금 더 고급지게 말하면, socket은 응용 계층(L4)에서 그 아래 계층(L3~L1)에 접근하기 위한 인터페이스입니다. HTTP 서버를 구성할 때 사용하는 DJANGO, SPRING 등의 라이브러리들도 socket을 통해 네트워크에 접근합니다. 이 글에서는 socket을 이용하여 http 서버를 만드는 코드를 c언어와 python으로 보여드리고 코드를 설명 드리겠습니다. 1. simple http server for linux //server.c //simple http server for linux //gcc server.c -...
-
- [python/c] CYTHON 입문자를 위한 Q&A
- 안녕하세요. SKHYNIX DRAM노광포토기술팀 장우석 TL입니다. CYTHON은 C로 작성한 코드를 PYTHON에서 활용할 수 있도록 하는 라이브러리, 스크립트 입니다. 최근 3.0버전이 릴리즈 되었습니다. (https://appmaster.io/ko/news/c-paweoro-pythoneul-ganghwahaneun-cython-3-gonggae) 이 업데이트 방향에 대해, 다들 어떻게 생각하시는지 궁금해요. 퓨어 파이선 모드, NUMPY와의 연계를 더 강화했고, 앞으로도 그렇게 한다고 하는데요. 개인적으로는 NUMPY로도 속도가 모자라서 CYTHON을 쓰는데, NUMPY와의 연계를 강화하기 보단, 그 외 C LIBRARY들과의 연계를 더 강화해줬으면 하는 ...

DEVOTEE를 활성화 시키면
지금 작성한 댓글에 AI가 댓글을 달아줍니다.